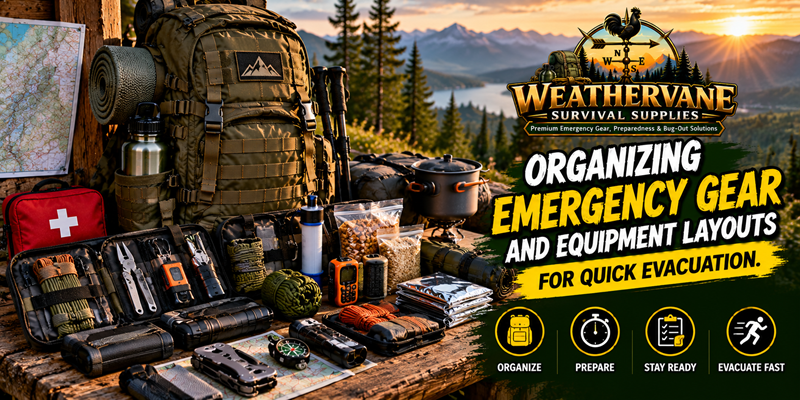
Organizing Emergency Gear and Equipment Layouts for Quick Evacuation – When sudden crises force an immediate evacuation, time becomes your most precious resource. Having high-quality emergency equipment is only half the battle; knowing exactly where every tool resides within your pack determines how fast you can respond. Proper gear organization transforms a chaotic scramble into an efficient, structured deployment during life-threatening scenarios.
Organizing Emergency Gear and Equipment Layouts for Quick Evacuation
A well-thought-out equipment layout prevents physical fatigue, protects sensitive gear, and ensures critical survival items remain accessible within seconds. Establishing an intuitive gear organization system allows you to maintain full control during high-stress evacuations.
The Fundamental Principles of Gear Organization
Proper load management relies on physics and quick-access logic. A poorly organized backpack shifts weight unpredictably, causing severe body strain, while mislaid trauma supplies can lead to dangerous delays during medical emergencies.
To build an efficient evacuation pack, organize your gear based on weight distribution, frequency of use, and functional priority. Grouping related items together inside dedicated modules creates a streamlined layout that works reliably in pitch-black conditions or severe weather.
Step-by-Step Equipment Layout Strategy
Dividing your tactical backpack into functional zones ensures optimal weight balance and rapid item accessibility. Follow this structural layout strategy when packing your emergency kit:
1. The Bottom Zone: Low-Priority and Bulky Items
Place items at the bottom of the pack that you will only need after reaching a safe shelter or setup site.
-
Sleep Systems and Shelter: Emergency sleeping bags, bivouac sacks, or folded tarps fit best at the base.
-
Spare Apparel: Extra moisture-wicking clothing, thermal layers, and dry socks provide a stable foundation for the rest of your gear.
2. The Core Zone: Heavy Equipment Near the Spine
Positioning dense, heavy objects close to your spine maintains your body’s natural center of gravity. This reduces shoulder pull and prevents lower back exhaustion during long-distance walks.
-
Water Reservoirs and Rations: Sturdy canteens, water bladders, and heavy food supplies should rest in the middle section right against your back.
-
Heavy Tools: Store cooking stoves, cookware, and heavy cutting tools directly above or beside your water storage.
3. The Top Zone: Frequently Used Essentials
The top compartment or brain of your backpack should house items required throughout your journey.
-
Navigation Tools: Maps, compasses, and small note pads.
-
Illumination and Trail Snacks: Compact LED headlamps, flashlights, and high-energy food bars.
-
Outer Weather Protection: A lightweight packable rain jacket or poncho for sudden downpours.
4. Outer Pockets and MOLLE Attachments: Emergency Priority
Items needed for immediate life-support or urgent action belong in exterior pockets or attached modular pouches.
-
Trauma First Aid Kits: Always secure medical supplies in an easily identifiable outer pocket.
-
Water Filtration Straws: Keep purification tools reachable without unbuckling the main compartment.
-
Communication Devices: Emergency radios and signaling whistles.
Enhancing Accessibility with Color-Coded Modular Pouches
Using internal dry sacks or color-coded organizer pouches elevates your packing system to professional standards. Rather than digging through a dark main compartment for a loose item, modular pouches allow you to retrieve entire functional categories at once.
For instance, housing medical gear in red pouches, water filtration tools in blue pouches, and navigation utilities in yellow pouches streamlines item identification. This visual clarity is equally beneficial when coordinating with family members or team partners SLOT PULSA 888 who may need to retrieve supplies from your pack during an emergency.
In digital management and complex operational environments, establishing a structured framework ensures seamless execution. Similarly, applying a systematic approach to physical gear layout guarantees that every essential resource remains instantly accessible when rapid deployment is required.
Maintenance and Muscle Memory Exercises
An emergency layout is only effective if you can operate it instinctively. Regular testing and maintenance guarantee field readiness when crisis strikes.
-
Practice Blindfolded Retrieval: Practice pulling specific items—such as your flashlight or first aid kit—out of your pack in complete darkness.
-
Standardize Layouts Across Family Kits: Keep gear locations consistent across all family members’ bags so anyone can locate vital tools instantly.
-
Conduct Seasonal Gear Audits: Inspect zip closures, verify pouch integrity, and replace degraded elastic straps every six months.
Final Thoughts
Organizing your emergency gear and optimizing your equipment layout is a crucial element of disaster preparedness. By balancing pack weight properly and placing critical life-support tools in intuitive outer zones, you maximize mobility and reduce operational stress. Take the time to refine your packing layout today so you can act decisively and safely when an evacuation becomes necessary.